After a decade of waiting patiently, the king of mech games is finally to take back its throne. Armored Core VI: Fires of Rubicon is the latest entry in the long-running mecha combat series developed by FromSoftware. The game features a new setting, a new story, and new gameplay systems that incorporate the knowledge gained from FromSoftware’s recent action game development. If you are a newcomer to the series, you might be wondering how to get the most out of this game. That’s why we have prepared this Armored Core 6 guide guide for you, covering everything from the basics of mech customization, combat, and missions. In this guide, you will find tips, tricks and strategies to help you become the best mercenary on Rubicon.
Armored Core 6 is not A Souls-Like
We all know that Dark Souls is what helped put FromSoftware on the map. While the studio has been developing games for decades, many of these have been moderate successes and only a few ever made a splash outside of Japan. Armored Core is no exception. It has long been a cult favourite among lovers of customizable mechs and bleak settings defined by post-apocalyptic industrial war machines. The moment-to-moment gameplay is all about building massive robots and embarking on short missions where effectiveness is always of paramount importance.
Now, that reputation is changing thanks to influences far outside its control. This is no surprise, but we hope curious newcomers jumping into it for the first time are still willing to give it a chance when it becomes obvious there are no bonfires nor blood echoes awaiting them. FromSoftware also seems to be aware of this crossover, but it isn’t diluting its creative vision for the uninitiated. This is an Armored Core game through and through.
Beginner Tips
Tutorial Missions
As you play through the first chapter of Armored Core 6, Tutorial Missions will unlock. These are all pretty basic, but they will give you a nice introduction to the different AC abilities. More importantly, each Tutorial Mission you complete will unlock a weapon to purchase in the parts shop.
Change Mechs Frequently
During your time as a mercenary, you are going to be taking on a wide variety of different mission types. Some of these missions will be better tackled by different types of ACs. A mission where you are destroying giant laser turrets will likely be best handled by a highly mobile mech equipped with a powerful long-range weapon, but if you are clearing out squads of weaker MTs, you will likely want to fight them using automatic weapons and missiles capable of locking onto multiple targets. This becomes even more accentuated once you take bosses into consideration. There are individual bosses that are a nightmare on the ground, but completely ineffective when you are in the air. Thankfully, bosses always have checkpoints before them, which will allow you to swap out your loadout. The important thing to keep in mind is that you can swap parts at these checkpoints, but you can’t buy new items. So, having a supply of different AC parts is a very good idea.
The Stagger Bar
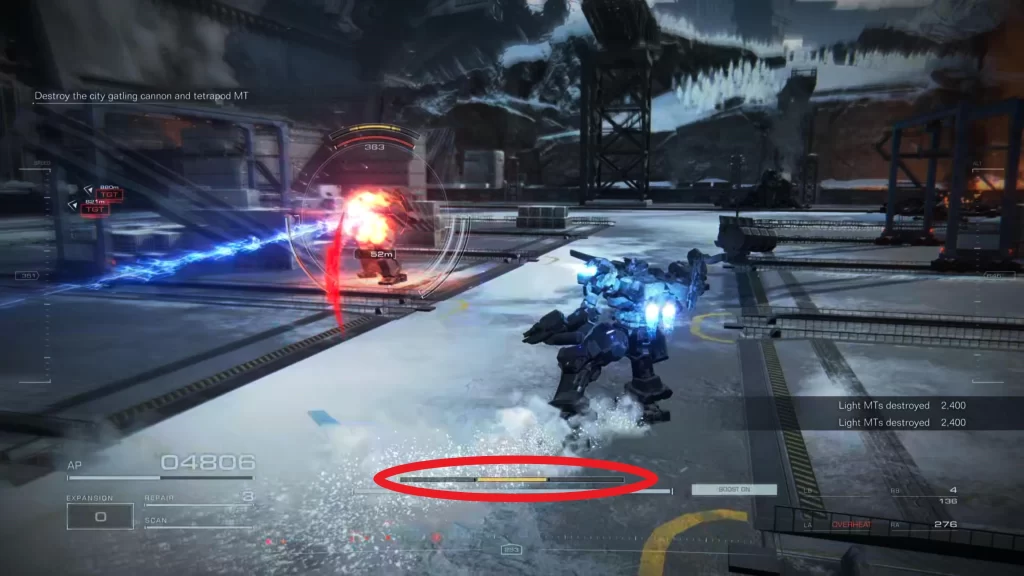
One of the most notable mechanical elements is the stagger bar. Much like in Sekiro, if you build this bar, you can stagger the bosses and deal hefty, hefty damage. This will be a large focus of your game plan.Maintaining a steady amount of pressure will be important. Certain weapons are better for staggering, so, look for weapons with a high level of Impact. On that note, while you will be spending a lot of time looking to deal stagger damage, there are weapons that can still deal solid damage even if the boss is unstaggered. One of the best features of Energy-type weapons is that they deal solid damage without having to stagger first. So, while the stagger bar is something you need to pay close attention to, it isn’t the end-all-be-all, sometimes it is better to just punch through it.
Exploration
While it may appear as if each stage is actually a giant arena filled with enemy mechs to pummel and destroy, there are actually quite a few secrets scattered throughout. For starters, once you complete the Destroy Artillery Installations missions, you will be able to engage in the log hunts, which will reward you for finding and destroying tougher enemies. Naturally, you will be rewarded for doing so. You will also find fallen ACs scattered throughout each stage. Interacting with them will provide you with documents and data that you will collect in your archive. These fallen soldiers are frequently placed in pretty out-of-the-way places. This means that if you are hopping from objective to objective you will miss them. Though rare, there are even a few chests scattered around certain stages.
Healing
While Armored Core 6 has gracefully provided you with its own interpretation of an Estus Flask, these repair kits have a few more strings attached. For starters, they can’t be rapidly used. There is a cooldown that takes valuable seconds to dissipate before you can heal again. What compounds this issue is that you may find that you can quite quickly become staggered yourself. You aren’t going to be able to heal while staggered. Your best bet is to heal once you have dodged a big attack, and your opponent is committed to their animation. As for the potency of your Repair Kits, you can increase their power by upgrading them with OS Chips. However, you won’t unlock OS Tuning until you complete the Retrieve Combat Logs mission near the end of the first chapter of the game.
Mobility (Quick Boost and Assault Boost)
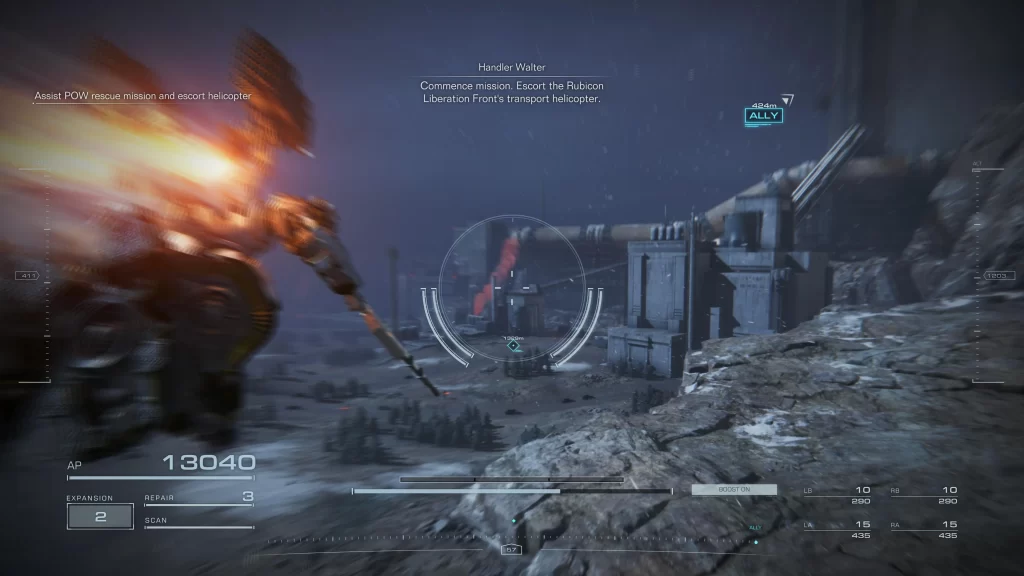
Even if you have gone the full-tank route, mobility is incredibly important in Armored Core 6. But if you are a Souls veteran, and you think you are simply going to handle mobility the same way you do in those games, you are sorely mistaken. First and foremost, you have the quick boost at your disposal, this is the closest parallel to the famous Souls roll. However, while the Quick Boost is fast and recovers almost instantaneously, gone are the I-frames of the Souls Roll. Your Quick Boost can be used to dodge to the left in battle, and you will most certainly be doing a lot of this. Naturally, you are going to need to string multiple QBs together sometimes, though when approaching an enemy, a zigzag pattern is an effective means for gaining ground on them. That being said, you will only want to approach this way if they are at a medium distance, as there is a better tool for approaching from a great distance.
At first, you may think that this is more of a traversal tool, and it, of course, is used to traverse the world of Armored Core 6, but the Assault Boost is also an excellent way to close distance. Not only is it much faster than your Quick Boost, but as you are propelling yourself toward your opponent, you can press left or right for a quick evasive maneuver. Some of the hardest attacks to avoid in the game are best dealt with by utilizing the Assault Boost. Missiles won’t be able to keep up with you. It also grants a bonus to your melee attacks, which means that you can often use it to dodge an attack, close the distance, and instantly deliver a powerful blow.
Leg Types
The primary aspect associated with your AC’s legs is how they affect your mech’s maximum load capacity. And while that is very important, each leg-type (outside of the basic Bi-Pedal leg-type) also has different abilities associated with them. These abilities will fundamentally change the way you use your AC. We will go into greater detail on these later in the next section of this guide.
AC Building
We’ll show you the ins and outs of AC construction. By the end of this guide, you will be able to craft your way to victory.
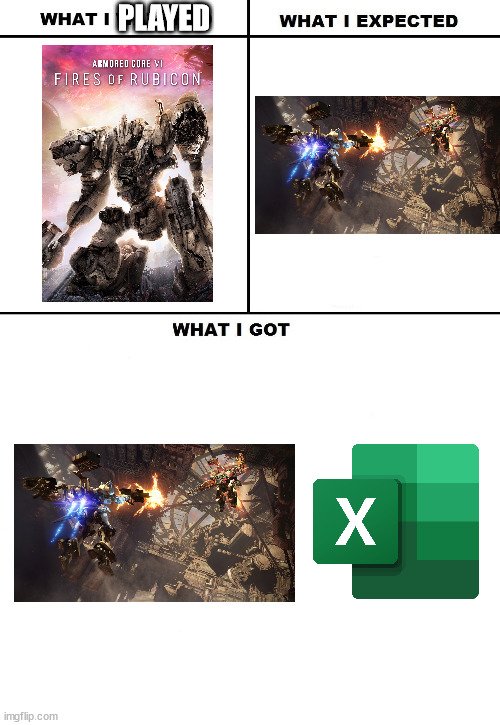
When you first jump into the Assembly, you’ll find that the stats are all pretty easily digestible. However, right at the bottom of the screen, you will see an option to “Toggle Display”. Press it and you will now be seeing all your stats. You will need this information when building the best AC possible. The basic display doesn’t tell you a Reverse Joint leg’s jump height . It doesn’t tell you your Arms’ Melee Specialization stat. It doesn’t even tell you your Core’s Booster Efficiency Adjustment stat. This is all very necessary information. So, when you are building an AC, you are going to need to brace yourself and delve into the spreadsheet. Don’t worry, after doing this a few times, the information becomes much easier to understand.
Load vs EN Load
This is the primary balance you need to strike when building an AC. Your EN Load is largely determined by your generator capacity and your Core (which will determine the generator efficiency with the Generator Supply Adjustment and Generator Output Adjustment stats). Your maximum weight Load is going to be determined by a number of parts, but the biggest contributor will be your choice of legs. The big catch is that the generator with the largest EN Load are extremely heavy, which will eat into your weight Load allotment. Balancing these components, while maintaining a lighter weight, is a matter of calculated sacrifices.
Build Weights
Balancing weight Load and EN Load is a big part of building your AC with increased weight comes a severe cost to your speed. The more you pile onto your AC, the slower your boosts will be, and the slower they will recover. This also tends to slow your Attitude Recovery and slows your ascent. Attitude, for those not in the know, is your stagger bar. So, the worse your Attitude Stability, the easier it is to be staggered. The heavier your AC is, the more Attitude Stability it will have. However, the lighter your AC is the better its Attitude Recovery will be. This is just one more dynamic associated with choosing your AC’s weight. Being heavy isn’t necessarily always strictly a negative thing, either. Heavier parts will come with more AP and Attitude Stability. Which means will be able to power through most hits. While an extremely light AC will be incapable of shrugging off any shot that has any oomph whatsoever. So, once again, you are going to need to choose what your priorities are.
Head
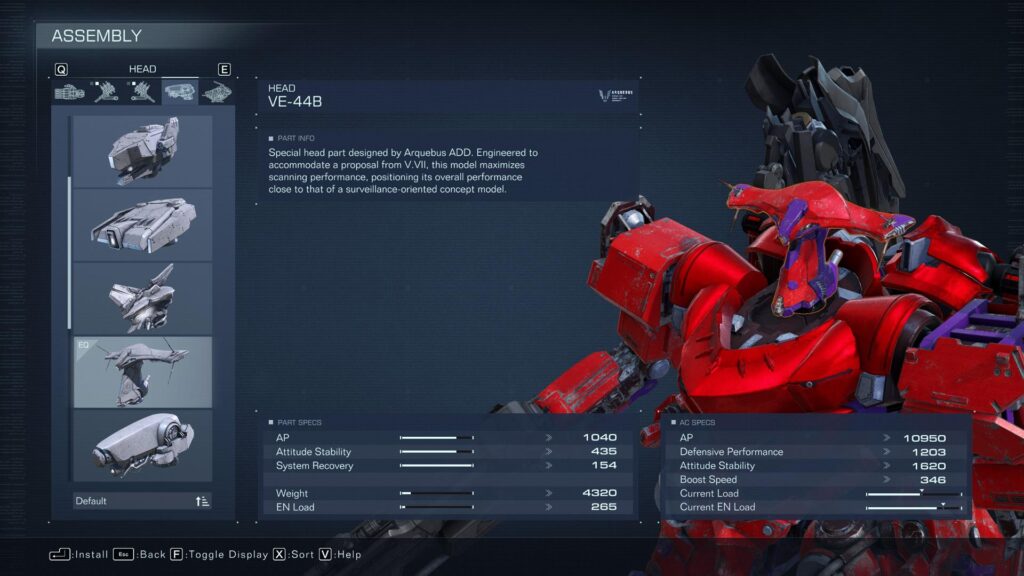
The least important AC part. Different heads will provide all the same statistics that all the other parts include. The one thing they specifically affect is your scanner range, recovery, and duration. While your Scan ability is useful, it isn’t really a functionality you need to fret over too much. If you are running a mission that is more focused on stealth, you will want to choose your head carefully, but otherwise, this is a pretty minor part of your AC build.
Core

The Core will play a big role in determining your AP as well as your resistance to Kinetic, Energy, and Explosive damage types. However, the bigger aspect is how it affects your Booster Efficiency, Generator Output, and Generator Supply. Switching out your Core can cause you to take a massive hit to the energy consumption of your boosters. For a lighter boost-centric build, you absolutely will need to pay close attention to the core you use. If in the process of trying to lighten your AC, you choose a Core that has poor Booster Efficiency, then you are likely undermining the whole reason you are looking to lighten your AC in the first place.
Arms
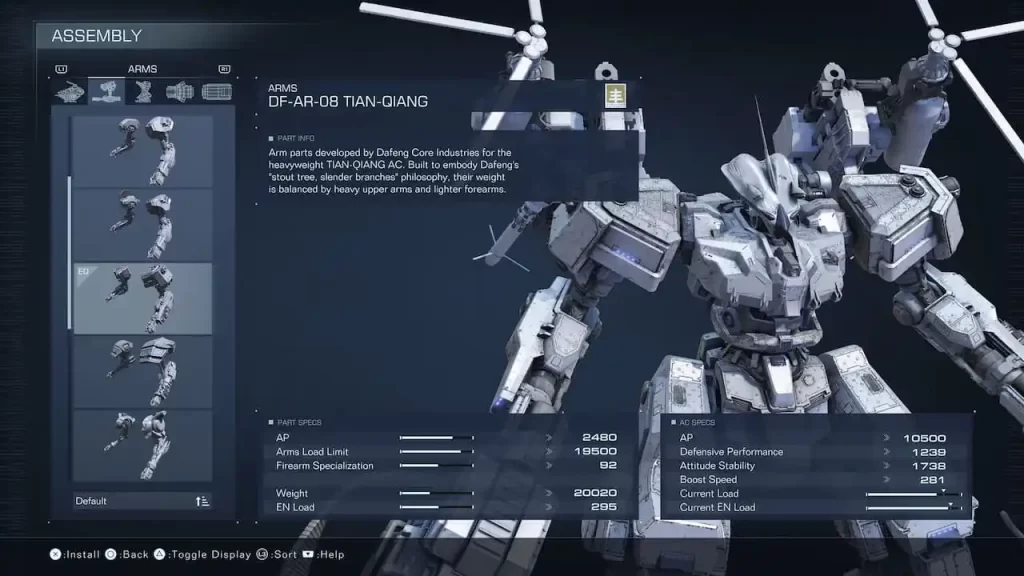
Don’t underestimate the value of your AC’s arms. The AC Arms are one of the largest factors for determining how much damage your AC deals. Like any frame part arms will affect your Defensive Performance and your AP. However, the bigger, more important, aspect is how they affect your weapon specialization as well as your recoil. A Pulse Blade slash with arms that have poor melee specialization can do half as much damage as a slash performed by arms that specialize in melee combat. That is huge! You need to take your weapons into consideration when choosing your arms. As for recoil, arms with poor recoil will result in erratic spray patterns. You don’t want that. You need to take recoil into consideration as well. Another aspect that doesn’t come up as often is Arms Load. Your arms can only hold so much. Some heavier weapons will require arms that can meet their weight requirements.
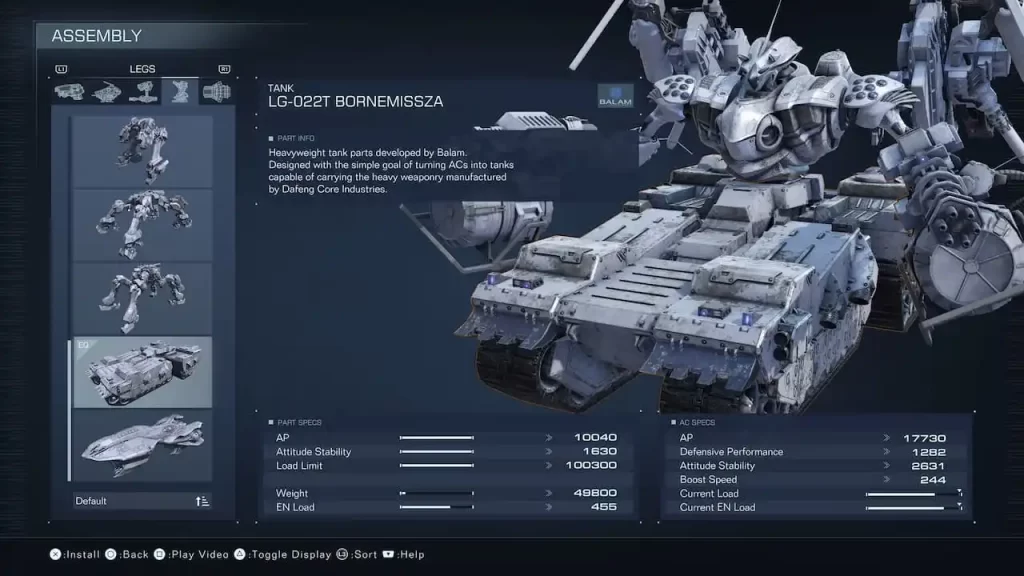
Legs
Legs are easily the most important part of the AC Frame. Legs are about setting your maximum weight Load as well as establishing your mobility options. Your leg type will be what determines your weight. However, what is more crucial is how they affect your ability to move, which is incredibly important in Armored Core 6. Below is the breakdown of all the leg types:
- Bipedal Legs: These are the all-rounder leg types. Bipedal legs provide no extra mobility options, but they are the legs that provide the best stats relative to their weight.
- Reverse Joint Legs: Reverse Joint Legs are likebad bipedal legs, but though they take a hit in the stats, they can let you jump super high. It is a pretty sizable tradeoff stats-wise, but they give you a huge benefit when it comes to mobility, as you can get an enormous amount of distance without using any energy whatsoever.
- Tetrapod Legs: Tetrapod Legs are inherently heavy. However, they do allow for greater versatility when it comes to how much you can load on them, and they have the ability to hover in the air for a very low EN cost.
- Tank Legs: On the ground, the Tank legs are stunningly quick. This speed, paired with their ability to drift around enemies, makes them very formidable against certain opponents. They also allow you to fire heavy weapons without any kind of recoil.
Boosters
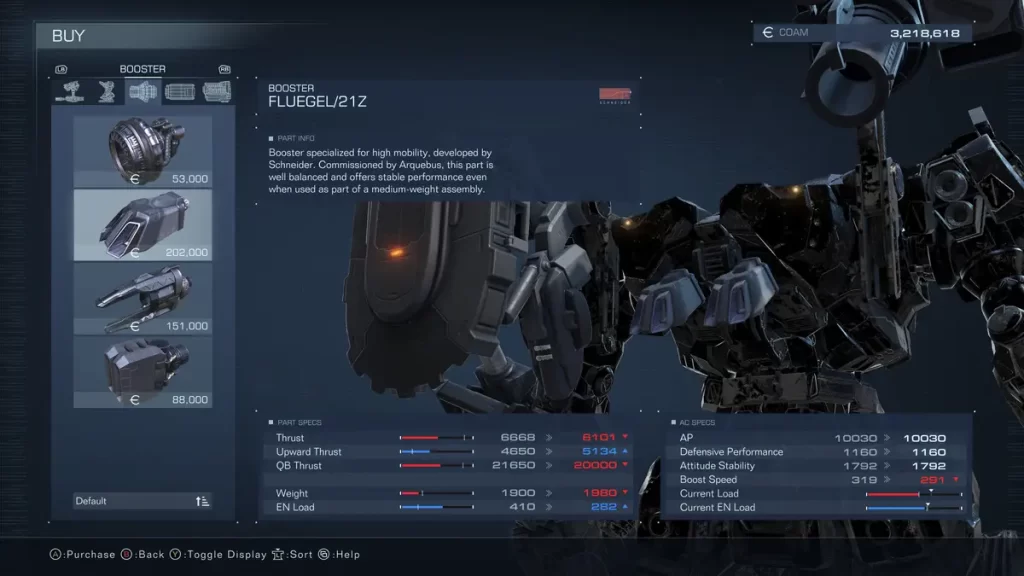
Boosters determine your thrust stats. There is the basic thrust, upward thrust, QB thrust, AB thrust, and Melee Attack Thrust. These stats are what determine how fast your boost is while performing those actions. Alongside these, you have the consumption stats. Those are your Upward EN Consumption, QB EN Consumption, AP EN Consumption, and Melee Attack EN Consumption. Naturally, these stats will determine how much energy is consumed by the respective action. Like most other things when it comes to building your AC, you will need to favor one over the other. Do you want to be able to perform multiple boosts for prolonged periods of time or do you want your boosts to be blazingly fast? As you play the game, keep this dynamic in mind and adjust to help minimize either running out of EN too often or not having speedy enough boosts.
Generator
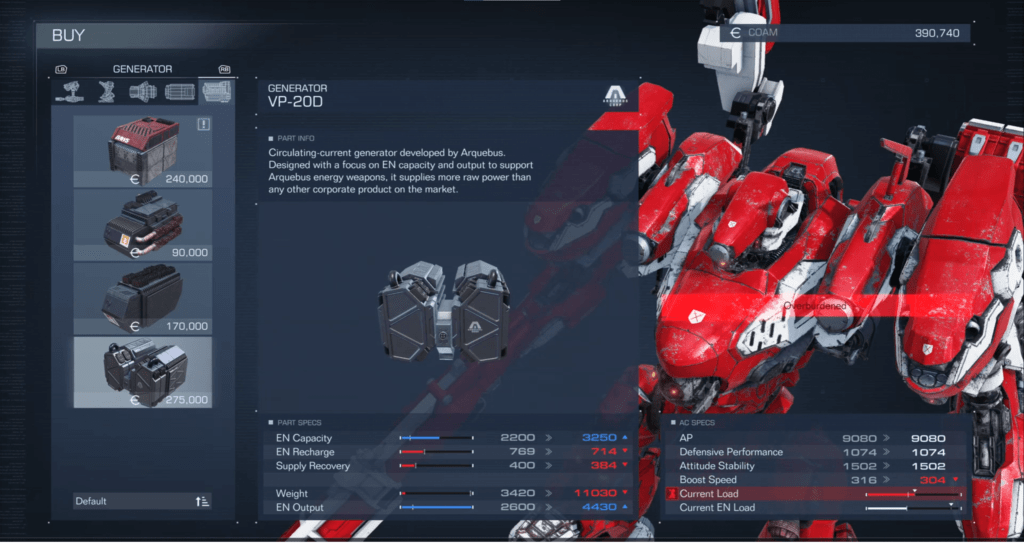
Your Generator is going to play a substantial role in determining your Energy capacity as well as the speed of your Energy Recharge. Generally speaking, the heavier the generator, the better all these stats will be. But, inevitably, that will also make your AC much slower. Two other stats of note are the Supply Recovery, as well as the Post-Recovery EN Supply. Supply Recovery will determine how quickly you start building energy again after it has been fully depleted (the lower this number, the greater the delay), while Post-Recovery EN Supply determines the speed at which you will regain energy once you have begun building energy again. Lastly, your generator will help determine how much power your Energy-based firearms deal (not blades or missiles). If you use Energy-based Firearms, you will need to pay attention to the Energy Firearm Spec. stat.
FCS
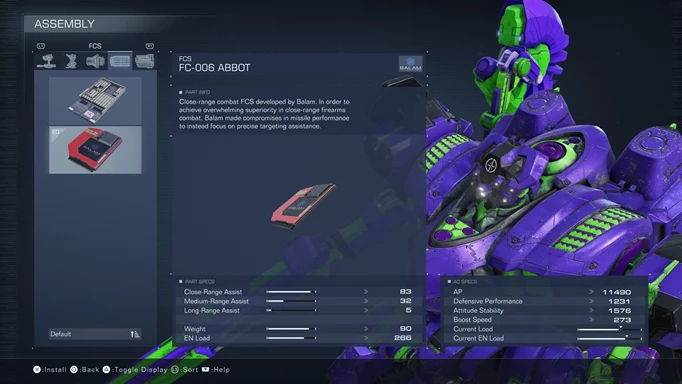
Your FCS will determine the effectiveness of your lock-on and aiming. What FCS you use will depend exclusively on what type of weapon you prefer. If you use Blades and Shotguns frequently, Close-Range Assist should be your priority, if you use Assault Rifles, you should focus on Medium-Range Assist, and your Cannons and Bazookas will favor Long-Range Assist. Beyond that, your FCS will also determine how long it takes to lock on to a target with your missiles. Missile Lock Correction is for locking onto a single target, and Multi-Lock Correction is for locking onto multiple targets.
Expansion
Core Expansions can be extremely useful and unlocked through OS tuning. So, which one you choose will depend primarily on your play style.
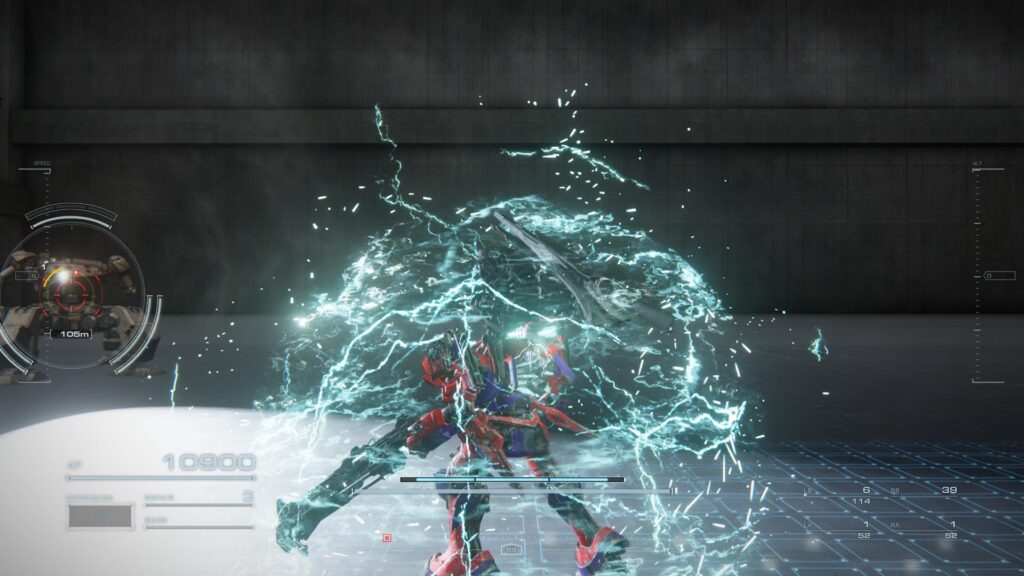
- Assault Armor: This will create an explosion that will disrupt any nearby enemies while also dealing damage to them. It leaves an energy field behind that will deal sustained damage to your foes.
- Pulse Protection: This will create a barrier that will stop all incoming fire.
- Pulse Armor: This will create a barrier that will follow your AC around and greatly enhance your AC’s defense.
- Terminal Armor: This armor will activate when your AP drops to 0, effectively saving you from death.
OS Tuning
The OS Tuning menu is unlocked once you complete the Retrieve Combat Logs mission near the end of the first chapter. OS tuning improves your AC without being accompanied by any downsides.. OST Chips are the currency used to purchase OS Upgrades. You are able to obtain them by completing arena battles. Once you first unlock the OS Tuning option, you will only be able to complete the Rank F Arena Battles, but as you finish more of the game, higher levels will become available. The higher the rank of the AC you fight in the Arena, the more OST Chips they will provide.
If you enjoyed this post, be sure to check out more content on Poggers Memes. Looking for more guides on Armored Core VI? Check out our build guide to beat Balteus and the Sea Spider or check out our article one some off meta AC builds.