In this article, we will cover the basics of Remnant 2, such as how to play and how to level up. We will also give you some advanced tips and tricks on how to optimize your build and use the archetypes. Whether you are a beginner or a veteran, this Remnant 2 beginners guide will help you become a better survivor.
Remnant 2 is a game that combines elements from the looter-shooter and souls-like genres, offering a challenging and rewarding gameplay experience. It is a game that is constantly evolving, with new content and features being added regularly. The first DLC for Remnant 2, The Awakened King, is set to launch on November 14, 2023, and will introduce a new storyline, a new archetype, new weapons and items, and new bosses and creatures so this is a great time to jump into Remnant 2 after months of updates and optimizations.
sTARTING oUT
Remnant 2 is a game with a surprising amount of replayability, owing in part to the randomization of worlds, and even the Map itself. There’s a lot of treasure to find and tough bosses to fight, but first, you’ll need to understand the basics of the game.
Choosing Your Archetype
After choosing the appearance of your character and playing through the prologue, one of the biggest choices you’ll make is choosing your starting class. There’s four in total, and each have their pros and cons. They also have unique skills, abilities and play-styles, ranging from aggressive to more methodical.
After you’ve reached Ward 13 visit Wallace down by the docks. When you speak with him, he’ll tell you that you need to pick an Archetype.
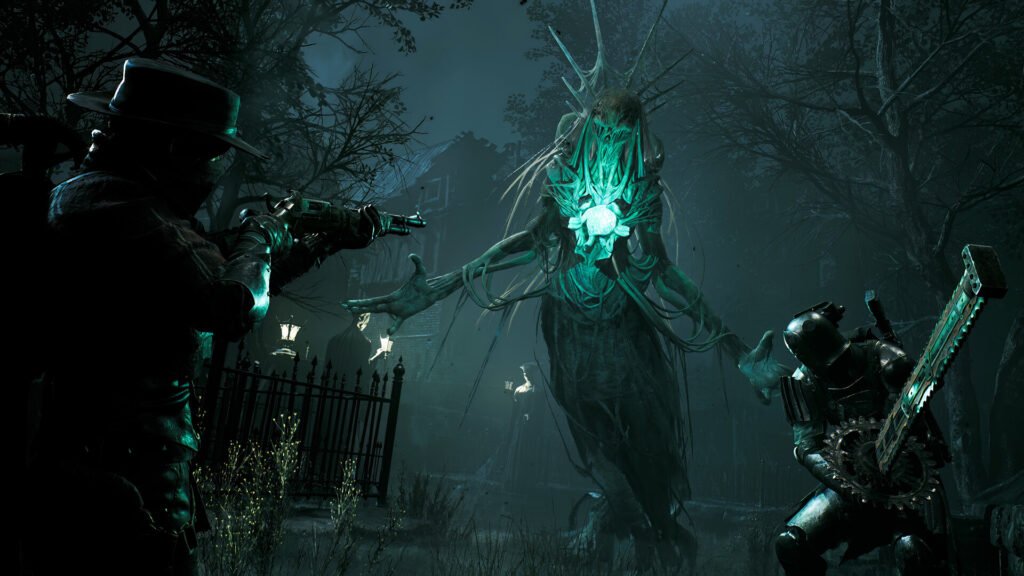
Challenger: This class starts with a shotgun and plenty of firepower to get up close and personal. There’s also a unique skill that allows you to essentially revive after being hit with a fatal blow. Do note though, this is a one time ability until you get back to a checkpoint sor die.
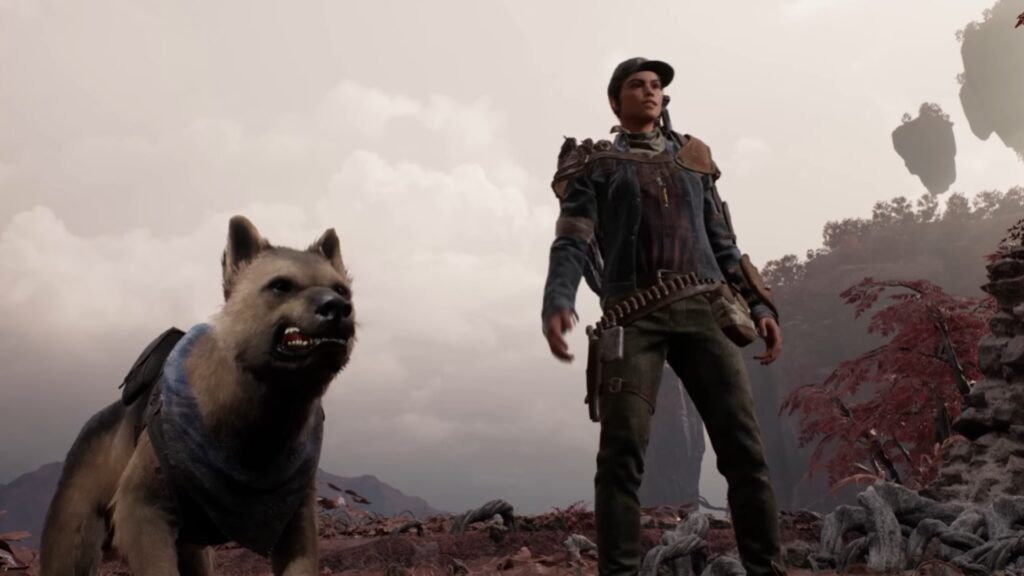
Handler: This class is followed by a companion dog that makes for a unique challenge, with the dog able to take out enemies on the ground while you tackle bigger foes or those flying around. If you do die, your trusty canine can attempt to revive you as well. Starts out with an assault rifle.
Hunter: The Hunter is a long-range specialist armed with a sniper rifle that can make short work of enemies from afar. There’s some neat skills and abilities here and conservative players should be right at home. Starts out with a sniper rifle.
Medic : The medic is best used whilst playing with friends, with a main perk that allows you to recharge your relic after restoring health. Starts out with a machine gun.
It’s important you choose the right archetype here and use the game’s early hours to get a feel for your chosen character. Whilst this Archetype can be switched out for another, there’s a tedious side quest and it’s rather costly to do so. For beginners we recommend The Handler.
Important NPCs
By now you’ve already met Wallace. He will give you the rest of the archetypes when you have the items for them. But Ward 13 has many more important NPCs crucial for your journey.
Brabus
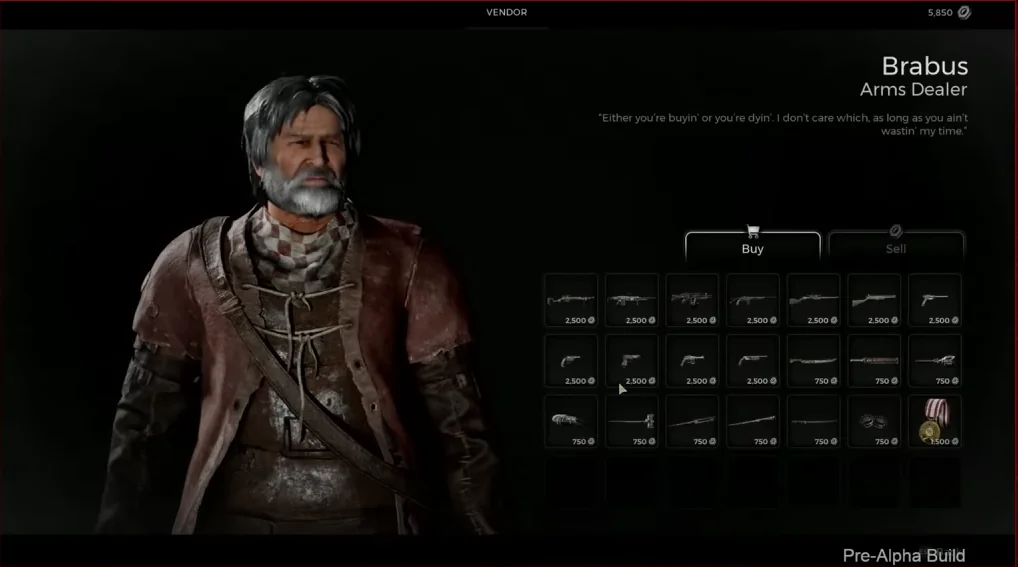
Your next stop after Wallace should be Brabus, the weapons merchant of Ward 13. Simply speak to him and he will automatically issue your Long Gun (main weapon), Hand Gun (secondary weapon), and melee weapon depending on what Archetype you chose. Test out your new guns on the firing range. If you don’t like them, don’t worry you can always buy any of the other guns from Brabus once you’ve earned enough Scrap.
Ava and Rigs
Your next step is back in the warehouse. On the ground floor talk to the two NPCs, starting with Ava McCabe.
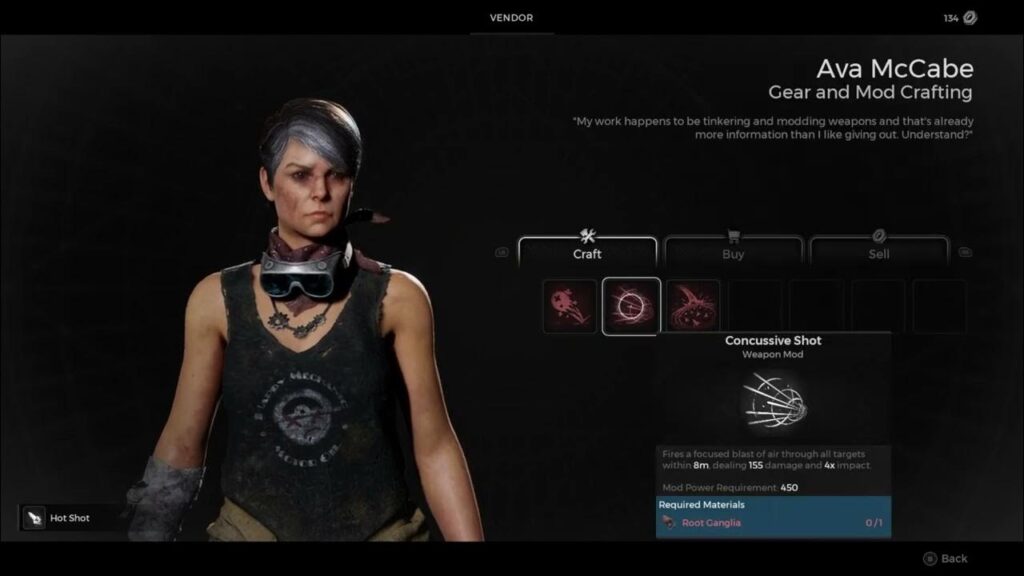
Ava can convert rare materials acquire from bosses into Mods for your Weapon. The first one is free and will consume the Root Ganglia you got from killing the Root Mantis prologe boss. You have four choices:
- Healing Shot: Launches a payload that explodes on contact with allies, healing a portion of their max health.
- Concussive Shot: Fires a focused blast of air that damages enemies in a radius in front of you.
- Scrap Shot: Fires a grenade that explodes into caltrops on the ground, slowing any enemies that walk over them.
- Hot Shot: Increases ranged damage and imbues your ammo with Fire. Shots apply Burning damage to enemies.
Select whichever you think would work best for your playstyle. As with the guns, you can acquire the other ones later once you’ve earned some Scrap.
Next, talk to Rigs by the nearby forge. Rigs can upgrade any one of your weapons once for free. I strongly suggest that you upgrade your new Long Gun that you got with your Archetype since that is your best damage potential. There are plenty of other people to talk to in town, but you can’t really buy anything from them just yet.
The World Stone
After Speaking with the important NPCs you’ll need to do a small quest which will unlock the Dragon Heart (Remnants version of the Estus Flask) your main healing item and the World Stone.
The World Stone will Teleport you randomly to one of the three areas in the game, rolled with one of the two possible story lines for each world.
The possible worlds are:
- Yaesha
- N’Erud
- Losomn
Your Yaesha will not necessarily look like my Yaesha, and so on. Each of the small circles on the map represents different zones within that world. As with many of the other options in this game, you won’t miss out on the other two worlds you’ll get to visit them later after completing the first and second worlds. The World Stone allows you to save your game and fast travel. It also fully heals you and restores your ammo. If you die, you will respawn at the last World Stone you interacted with. However, using the World Stone will also revive all enemies. You have to travel from World Stone to World Stone to progress further into a world and eventually fight its boss.
Archetype Guide
Archetypes are the classes in Remnant 2. Each one comes with its own Skills, Perks, and an Archetype Trait. Most of these must be unlocked by levelling up your class, with the max level being 10. It’s possible to change your Archetypes freely, as long as you’re not in combat, and you have it unlocked, though new ones must be leveled up from 0. You can also buy the weapons and armor that you didn’t start with from Brabus and Whispers in Ward 13.
Secondary Archetypes
It’s also possible to equip a secondary Archetype on top of your main one. This grants access to everything you’d have from equipping it as your main Archetype, except for the Prime Perk. To equip a second archetype, you must first level up your starting Archetype to level 10. Then, you’ll have the option to equip a second Archetype from the character menu. Once equipped, it will still gain experience like normal until level 10.
How to Unlock The Base Archetypes
- Medic: Dr. Norah sells the Medic Pin needed to unlock Medic for 1,500 Scrap in Ward 13.
- Hunter: Brabus sells the Rusty Medal needed to unlock Hunter for 1,500 Scrap in Ward 13.
- Challenger: Reginald “Reggie” Melone will sell the the Old Metal Tool needed for Challenger for 1,500 Scrap in Ward 13.
- Handler: Mudtooth will sell the Old Whistle needed to unlock Handler for 1,500 Scrap in Ward 13.
Secret Archetypes
There are 7 additional secret Archetypes you can get your hands on in Remnant 2 and the DLC will add a new 8th, there’s a specific way to get each one, and they can’t just be purchased.
Gunslinger
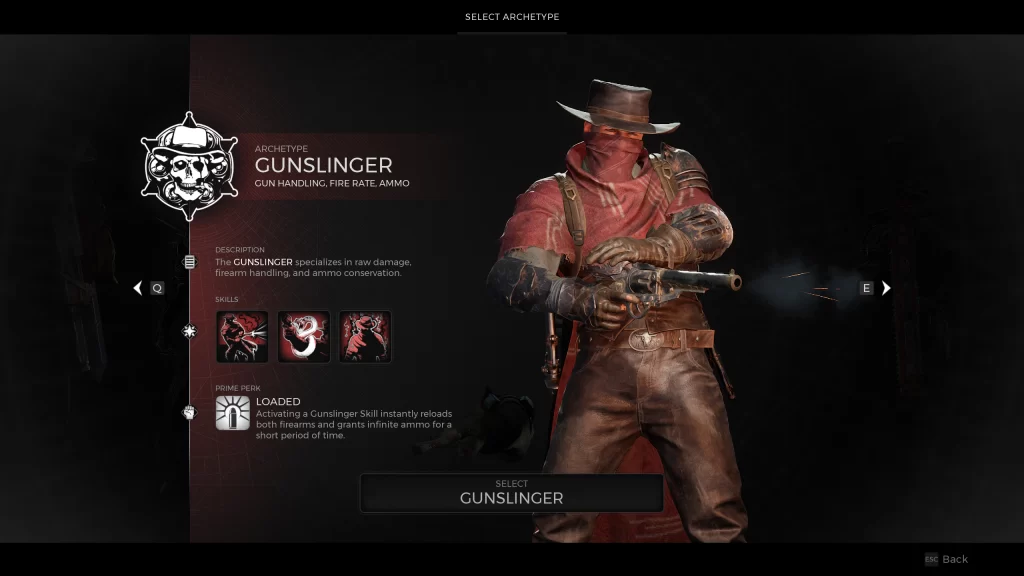
Mudtooth can be asked to tell stories after you talk to him for the first time. You can pick this option multiple times, eventually earning the Gunslinger’s Ring. Do this enough times, and you’ll also get the Iron Cylinder material needed to unlock Gunslinger, along with the Gunslinger’s Charm.
It’s possible to get Mudtooth to tell all of his stories at once, but the amount he has seems to be based on your current playtime. So if he stops having new stories to tell, play through the campaign some more and then return later.
Summoner
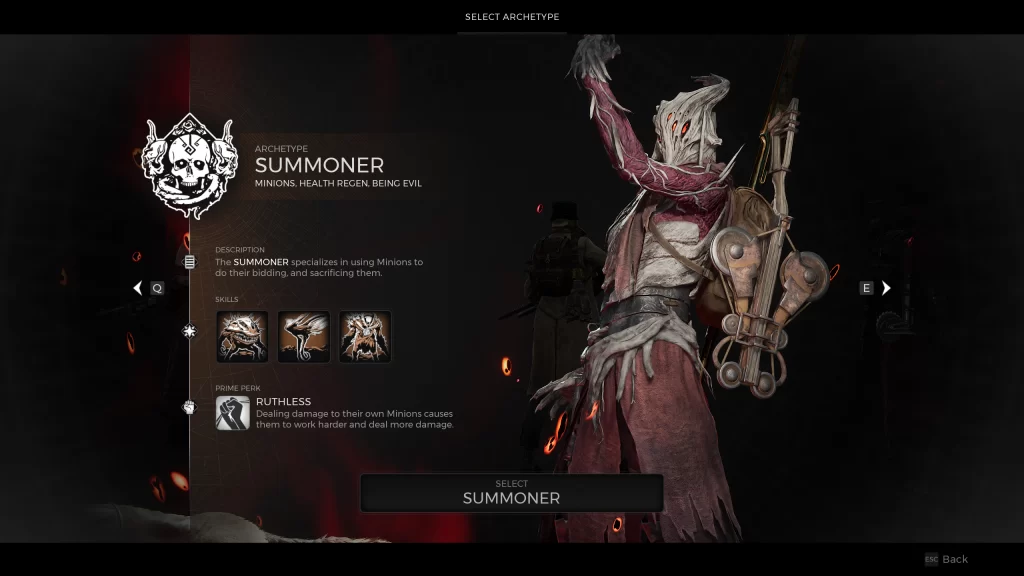
The Fabled Grimoire material needed to unlock the Remnant 2 Summoner can be found in Yaesha. However, there are a few steps to obtain it. First, you must have a version of Yaesha with a Blood Moon Altar in it. Using it, you’ll be able to craft the Faded Grimoire with 15 Blood Moon Essence, 5 Lumenite Crystals, and 1,500 Scrap. Once you purchase the Faded Grimoire, take it to Wallace in Ward 13 to unlock Summoner.
Alchemist
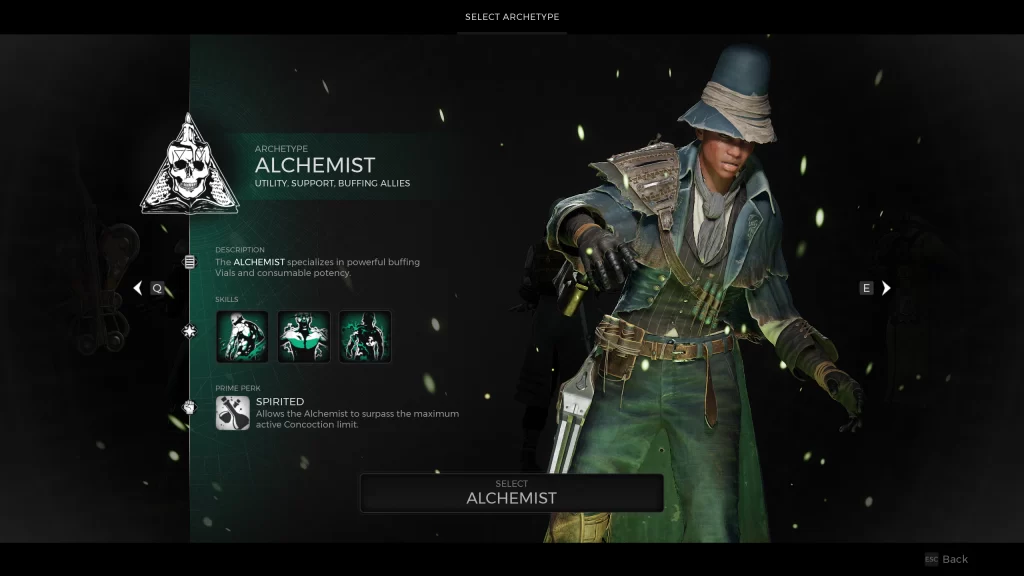
The Alchemist in Remnant 2 one isn’t overly difficult to unlock, but it takes a little luck. Head to the outdoor areas of Losomn like Ironborough and look for the large sewer drains. If you stand near these, you can potentially be dragged into a new area by a large creature.
While not guaranteed, you should eventually trigger this event after checking enough drains. After a short fakeout fade-to-black, you’ll wake up in a pile of bones. The monster will reappear once you try to leave, so kill it to claim the item you’re looking for the Mysterious Stone. Take this to Wallace, and you’ll be able to unlock the Alchemist.
Engineer
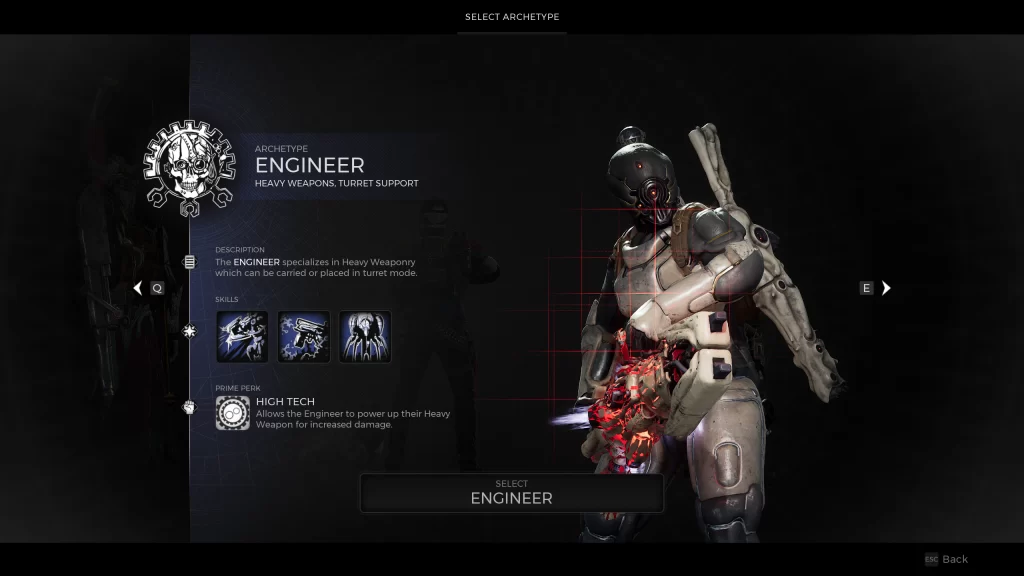
The item needed to unlock Engineer in Remnant 2, the Alien Device, can be found in N’Erud. I found it in the area The Eon Vault, which will only appear in versions of the world where you fight Tal’Ratha the starting location for this world type is Forgotten Prison. Scour the edges of The Eon Vault until you see a gap between some rocks, and head through. You’ll first see a body, which is carrying the Technician armorset. Further in, you’ll be able to interact with an object on the ground to pick up the Alien Device.
Invader
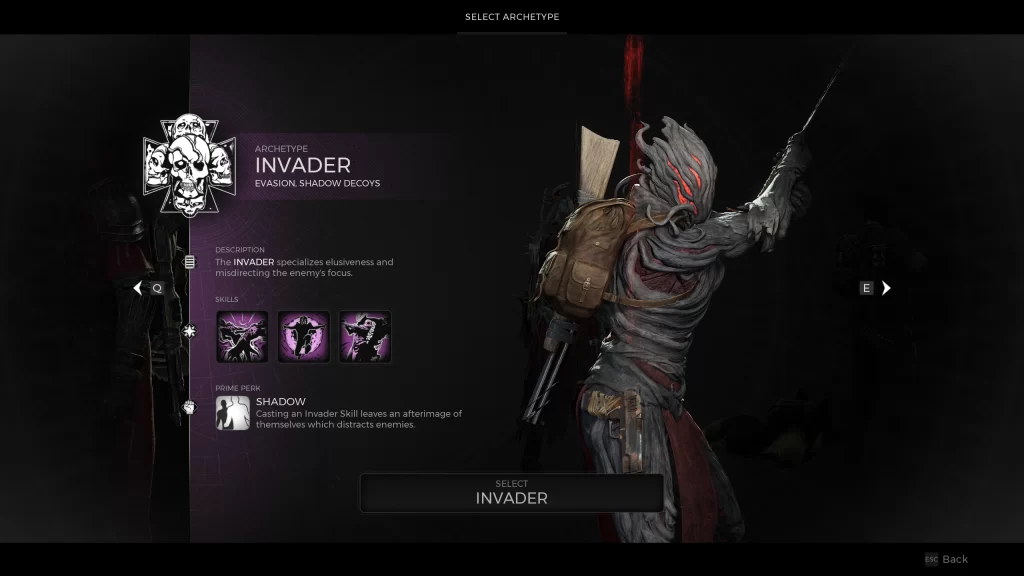
The Invader Archetype is possibly the most obscure to find, first requiring you to obtain a weapon from a different world than the key material is in.
To start with, you must first head to a version of the world Losomn that contains the area Marrow Parish. If you don’t see this as the starting area in your version of Losomn, keep rerolling the campaign or adventure world until you get one that starts there. From there, progress through Losomn until you’re able to enter the mansion. Once inside, you must find 3 Stone-Carved Dolls to give to the woman locked in a cell on the lower floor.
Once the dolls are handed over, you’ll need them to unlock the cell. This is done with the Prison Cell Key, found on the upper floor by the balcony. Opening the cell will let you grab the Nightweaver Stone Doll. From there, keep progressing through the world as normal until you reach the Tormented Asylum. Inside, you’ll find a cell with an eerie glow covered in webbing. Interacting with this will allow you to place the Nightweaver Stone Doll, netting you the Dreamcatcher melee weapon in return.
With all this done, you must now head to Remnant 2’s final world. Near the end of the Corrupted Harbor, you’ll end up inside a crashed ship. There’s a small hidden entrance on the lower floor of this ship, leading into a separate outdoor area. This is where the Dreamcatcher comes into play. Equip it, and attack the fog-producing growth to drain the fog and obtain a Walker’s Dream. Using this item, you’ll be transported to a separate area known as Twilight Vale.
Leaving the ship here, you’ll encounter a boss version of the tall enemies featured in this world. It’ll summon enemies once its health is lowered, so take them out before focussing again on the boss. If you end up losing the fight or quit out of the area early by accident, you must return to the secret area to get another Walker’s Dream. Killing the boss will net you the Supercharger Mutator, and the Wooden Shiv material. Taking the Wooden Shiv back to Wallace will let you unlock the Invader Archetype.
Explorer
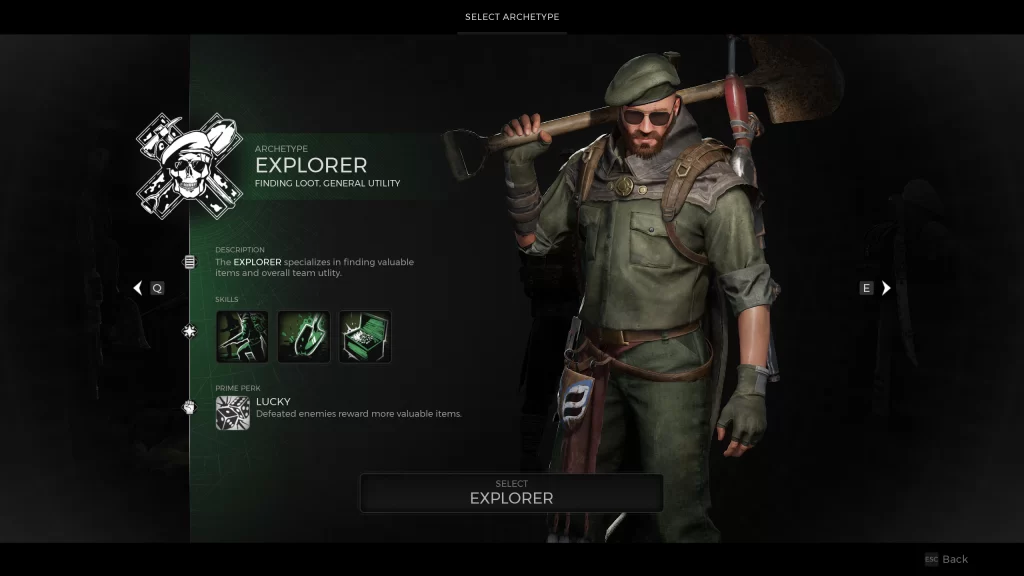
The Remnant 2 Explorer Archetype can only be earned once you’ve completed the campaign. After defeating the final boss, you gain the Broken Compass material. Take this to Wallace to get the Explorer.
Archon
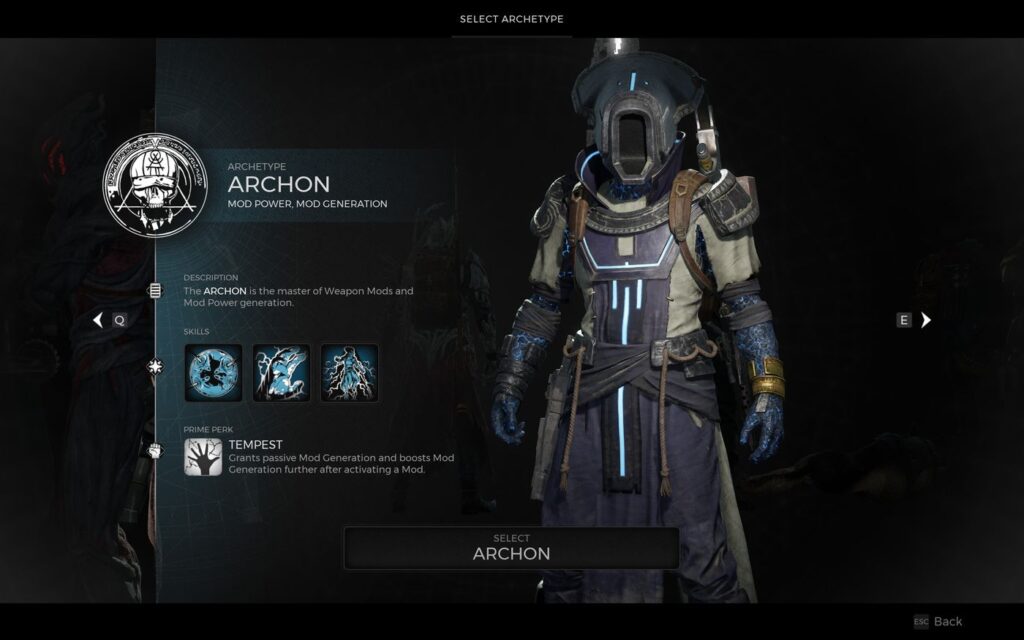
Unlocking the Archon Archetype is no small feat, and the devs made it clear that you’d have to datamine the game’s files to figure out how to unlock this powerful class, which is why it’s tough to figure out.
You’re going to need a few specific items, and equipment that you’ll need to have equipped in order to enter the Red Door in Labyrinth:
- Void Heart: You’ll need to get the version of N’Erud that has you fight Sha’Hala as the final boss and choose between destroying or shutting down the core. After 12 real life hours, a ship to Alepsis-Taura will be made available, so you cannot destroy the core as that will destroy N’Erud.
- Leto’s Amulet: You’ll get this by flopping 100x by wearing heavy armor, sold by Reggie in Ward 13.
- Explorer’s Set: Beat the game, and this armor will become available to buy from Whispers in Ward 13.
- Fortune Hunter & Worm Hole Abilities: You’ll need to have the Explorer Class up to level 10 and Invader Class to level 5.
- Amber Moonstone: Cass sells this, and if it’s not there, her stock resets every 30 minutes.
- Black Cat Band: Die 15 times to get this.
- Ford’s Scattergun: You’ll need to complete Yaesha and defeat the corrupter without offending the queen. Once defeated, you’ll return to her and if you’re courteous she’ll give you the Seal of the Empress. Head into the library section, and a hidden area will open with this gun inside.
- Labyrinth Staff: There’s a portal in Labyrinth that’s constantly changing and it’s near the main portal. Facing the portal, head left and you’ll see some stairs jutting out, image above. Take a leap of faith down to the un-formed path, and follow it until you hit a roadblock after a few moments a crumbling platform will appear that you can use to cross. Head onwards until you drop down and fight Bastion, and you’ll see the staff on the opposite end of the area.
- Zania’s Malice: Spawn into the Ashen Wasteland, and make your way to the first checkpoint. Head the opposite direction of where you should go to continue, and you’ll find a hole in the floor that drops down, with another dropdown leading you to the Zania’s Malice Relic.
- Anastasija’s Inspiration: Sold by Whispers in Ward 13 for 3,000 scrap.
With all of the above equipped, you can now enter the Red Portal in Labyrinth and you’ll be taken to the literal Backrooms to find 2-3 items, including the Strange Box required to unlock Archon.
Tips and Tricks
Customize Your Dragon Heart
Wallace can also upgrade the number of charges the Heart holds. You only start with three, but for a Lumenite Crystal, you can upgrade the charges by one and you’ll definitely need more the further you get into the game. It’s also worth paying a visit to Dwell, the horned NPC over by the Crystal Checkpoint. As he can also sell you some modifiers for your Dragon Heart if you have the crafting materials to make it, which is normally Relic Dust. Though you can also find plenty of them in the wild if you’re strapped for resources.
Multi-Class
One crucial piece of information worth knowing going into Remnant 2 is that you really should equip a Secondary Archetype. These are essentially multi-class roles that unlock once you power up your current character to level 10. When that happens you can equip a Secondary Archetype by visiting Wally which basically gives you the abilities of another class, minus the Prime Perk bonus. So for example you could mix the elemental buffs of the Alchemist with the tanky Challenger. Or the healing bursts of the Medic with a bullet-spewing Gunslinger. It’s a unique and incredibly useful mechanic that’s honestly mandatory if you plan on playing on the higher difficulty settings as it substantially boosts your strength and usefulness in a fight.
Stick With One Set Of Weapons
A big part of your success with Remnant will come from upgrading your weapons. While it’s tempting to switch around to an array of different guns and abilities, it’s actually a much better idea to find guns you’re comfortable with and keep upgrading them. Not only will they do more damage, but you’ll become more adept and understand the pros and cons of each. Ideally you want to strike a happy medium and have one gun for long-range and another for close-combat, given Remnant II’s varied combat.
Revisit Ward 13 Often
Take every opportunity to revisit the Hub between checkpoints. The various worlds you’ll be visiting can absolutely drown you in resources and crafting materials and those can be put towards some helpful upgrades or new powerful weapons from Brabus. This is especially true after boss fights as they’ll often drop an extremely rare crafting part that you can shove into your guns for new abilities. It’s also very easy to grind up what you need if you’re short, so take some time out of your adventures to visit the NPCs back at Ward 13.
Be sure to check out more content on Poggers Memes. Enjoy cooperative games with synergistic abilities? You can check out the best 5 Warframes for a beginner in the new Duviri Paradox update. Or check out our article on how to get the best weapons in Remnant 2.